
Creating Your First Android Application
Part 1 of this Beginning Android tutorial series covered the overview of the Android platform. If you haven’t seen it yet, please take some time to read it before reading this article.
In this article, you will develop your first Android application. You will learn how to send SMS programmatically within an Android application.
NOTE: This tutorial assumes that you are familiar with Java programming and IDE’s like Eclipse and NetBeans.
Brief Contents
- The four Components of Android
- Creating The SMS Application
- Obtaining The Required Tools
- Developing SendingSMS project
The Four Components of Android
Your Android projects should contain at least one class that is derived from one of these components:
- Activity – If your Android application has a UI, you must create one class that extends this component. You will learn how to create an Activity in this article.
- Service – If your Android application has a long running task, you should do it in the background and not in the UI thread. This class provides the facility to make a task run in the background.
- BroadcastReceiver – If your Android application will receive and respond to global events such as the sending and delivery of SMS, your class must be registered as a subclass of this component. You will learn how to use this component to get feedback after sending SMS.
- ContentProvider – If your Android application has data that you wants to share with other Android applications, you should create and implement this component.
Creating The SMS Application
Android development has four phases. Below is a diagram of Android development process:

Obtaining The Required Tools
Before you can start creating Android application, you must setup your development environment first. You will need the following to develop our SMS application:
- Android SDK
- Eclipse (Helios or greater)
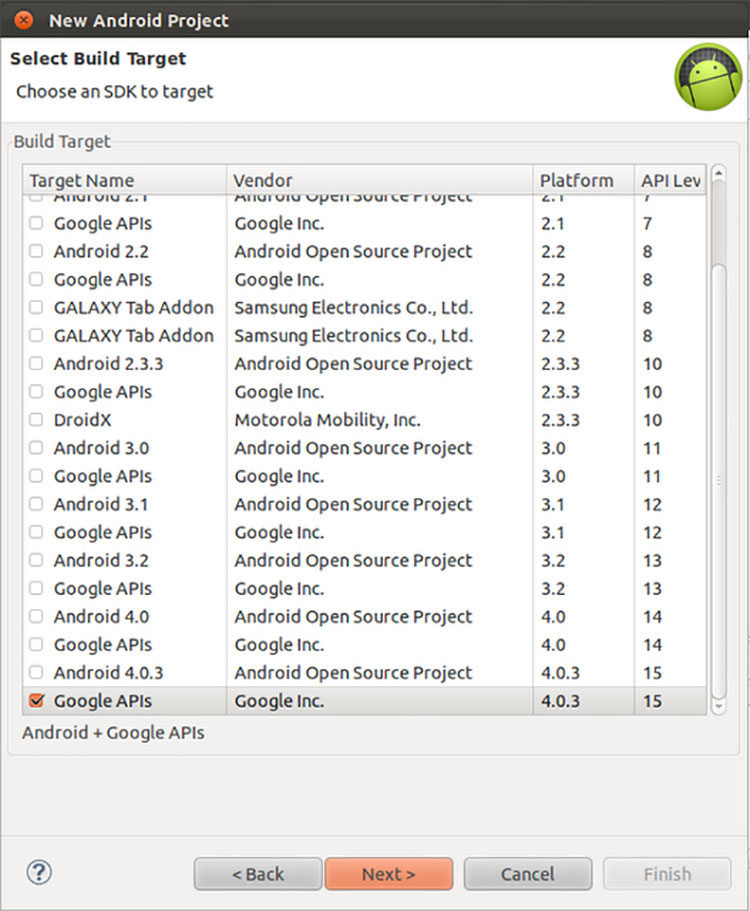
Note: You need to install at least the Android 1.6 platform for this tutorial.
See Android Installation Instructions and System Requirements for more information and watch this video to learn how to setup your development environment for the first time on Windows.
I use Windows 7, Java 7, Eclipse Indigo for Java Developers, ADT and Android SDK revision 17 in this screencast.
Developing The SMS Project
Let’s create your first simple and practical Android project. I assume that you are already familiar with Java programming; I will not explain each line of code in detail.
Follow the steps:
- Start your Eclipse IDE
- Go to File -> New -> Project
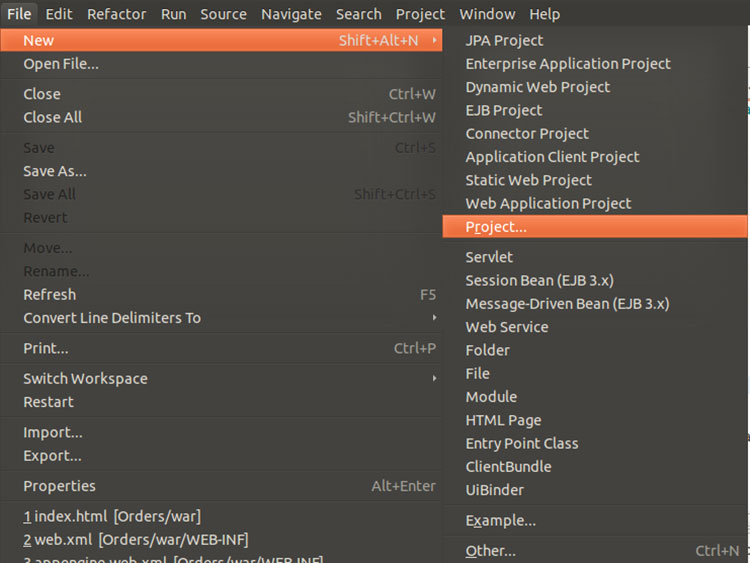
- Select Android Project in the New Project dialog
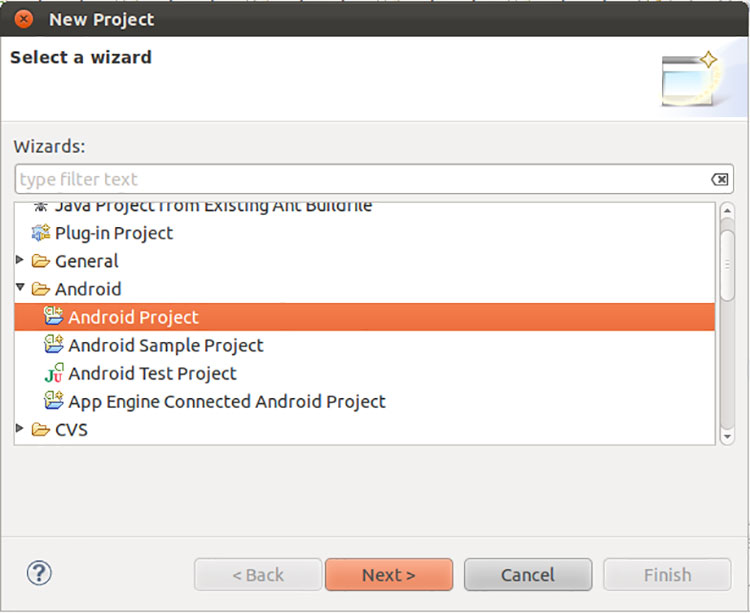
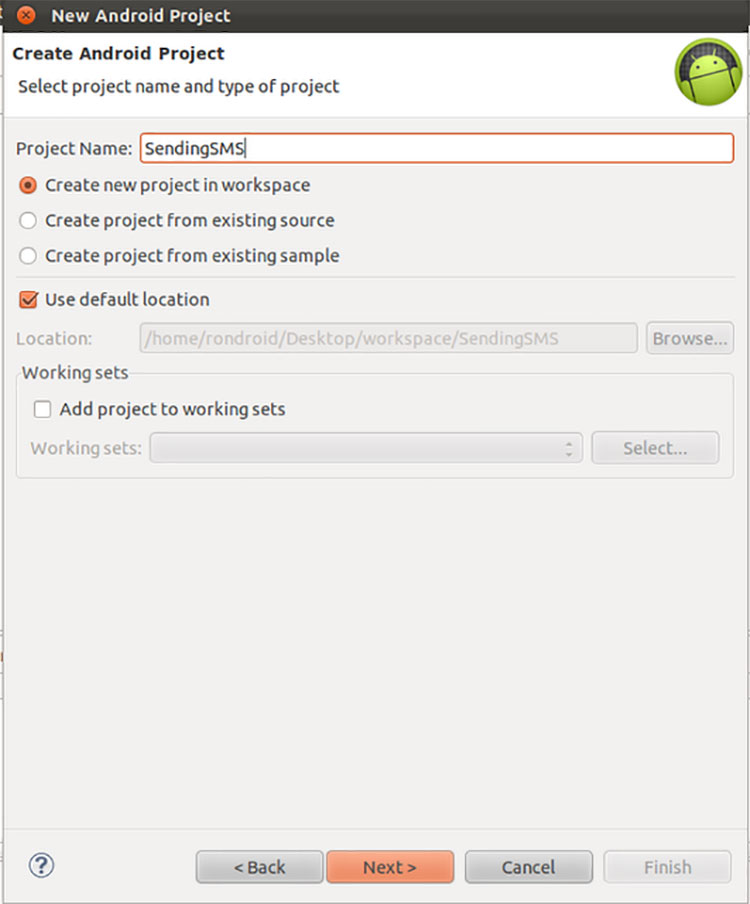
- Complete the New Android Project wizard.
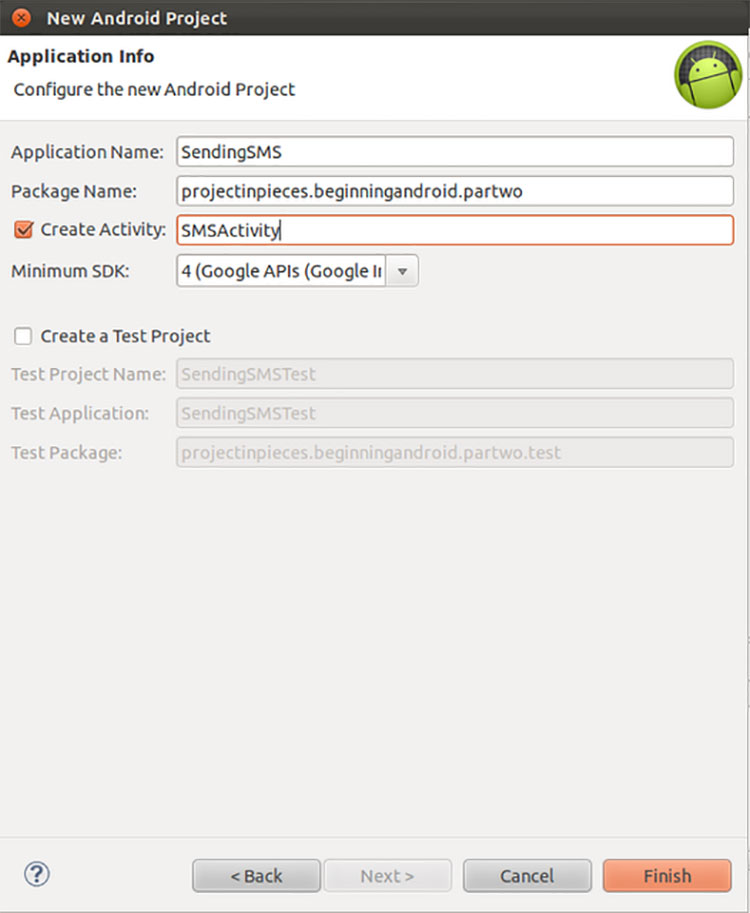
- Open
main.xml(located in/res/layout) and replace its contents with the code below:<RelativeLayout xmlns:android="http://schemas.android.com/apk/res/android" android:layout_width="fill_parent" android:layout_height="fill_parent" > <EditText android:id="@+id/editRecipient" android:layout_width="fill_parent" android:layout_height="wrap_content" android:layout_alignParentLeft="true" android:layout_alignParentTop="true" android:layout_marginTop="14dp" android:hint="@string/recipientHint" android:inputType="phone" /> <EditText android:id="@+id/editMessage" android:layout_width="wrap_content" android:layout_height="wrap_content" android:layout_alignParentBottom="true" android:layout_alignParentLeft="true" android:layout_marginBottom="17dp" android:layout_toLeftOf="@+id/sendButton" android:hint="@string/messageBodyHint" > </EditText> <Button android:id="@+id/sendButton" android:layout_width="wrap_content" android:layout_height="wrap_content" android:layout_alignParentRight="true" android:layout_alignTop="@+id/editMessage" android:onClick="send" android:text="@string/sendButtonText" /> </RelativeLayout> - Open
SMSActivity.java(located in/src/) and add the following code:public void send(android.view.View view) { final android.widget.EditText recipient = (android.widget.EditText) findViewById(R.id.editRecipient); final android.widget.EditText message = (android.widget.EditText) findViewById(R.id.editMessage); final android.telephony.SmsManager smsManager = android.telephony.SmsManager.getDefault(); final String addr = recipient.getText().toString(); final String text = message.getText().toString(); smsManager.sendTextMessage(addr, null, text, null, null); recipient.setText(""); message.setText(""); } - To allow our application to send SMS, add the following permission to AndroidManifest.xml (located in your project’s root directory)
<uses-permission android:name="android.permission.SEND_SMS" /> - That’s it. Deploy and run the project.
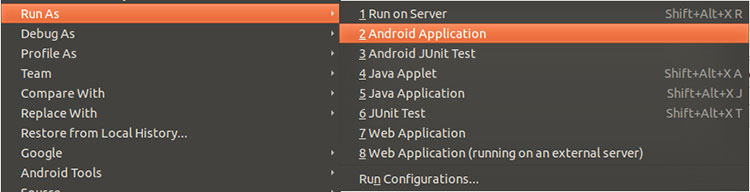
How It Works
Steps 1 to 4 show you how to create a new Android application in Eclipse. Steps 5 to 7 cover the code that will enable your new application to send SMS: step 5 changes the layout of your application’s UI; step 6 includes the actual code that sends an SMS, and; step 7 includes a code snippet that informs our users about the permissions the application needs to send SMS. Step 8 shows you how to run the application using the Android device emulator provided by the Android plugin for Eclipse. The application uses the built-in Android telephony API class android.telephony.SmsManager to send SMS; for more information, see: documentation of SmsManager API.
The complete source code for this application is hosted at Kenai.com. You must have a Subversion client installed on your machine to checkout the project repository. If you have the command line Subversion client, you can checkout the repository by running:
svn co https://svn.kenai.com/svn/ron-os-sample-code~project-code-repository/BeginningAndroidProjects/SendingSMSThis will checkout a copy of the SendingSMS project.
Getting Feedback After Sending The SMS
Note: The code snippets in this section are from a modified version of the source code in the SendingSMS project; the full source code is in a separate project called SendingSMS2.
You now know how to send SMS message using SmsManager class; however, how will you know if the message was sent successfully? To do so, you need to create an instance of PendingIntent and pass it as the 3rd parameter to sendTextMessage() method of SmsManager. You also need to register a BroadcastReceiver to listen to global event named “SMS_SENT”.
You can checkout the project’s repository via the command line Subversion client by running:
svn co https://svn.kenai.com/svn/ron-os-sample-code~project-code-repository/BeginningAndroidProjects/SendingSMS2
Once you’ve checked out the SendingSMS2 project, open it with Eclipse and take a look at the new implementation of the send() method of SMSActivity.java. See the code in bold:
public void send(android.view.View view) {
  android.telephony.SmsManager smsManager = android.telephony.SmsManager.getDefault();
  android.app.PendingIntent sendingIntent = android.app.PendingIntent.getBroadcast(this, 0,
    new android.content.Intent(SMS_SENT), 0);
  String addr = recipient.getText().toString();
  String text = message.getText().toString();
  sendButton.setEnabled(false);
  status.setText(R.string.messageSending);
  smsManager.sendTextMessage(addr, null, text, sendingIntent, null);
}
I’ve implemented a BroadcastReceiver to listen for “SMS_SENT” update:
private final android.content.BroadcastReceiver smsSentReceiver = new android.content.BroadcastReceiver() {
  @Override
  public void onReceive(android.content.Context context, android.content.Intent data) {
    switch (getResultCode()) {
    case RESULT_OK:
      status.setText(R.string.messageSentSuccess);
      break;
    default:
      status.setText(R.string.messageSentFailed);
    }
    recipient.setText("");
    message.setText("");
    sendButton.setEnabled(true);
  }
};
Then I register the BroadcastReceiver in the onStart() method, which is called when the SMSActivity starts:
@Override
protected void onStart() {
  super.onStart();
  registerReceiver(smsSentReceiver, new android.content.IntentFilter(SMS_SENT));
}
Then I unregistered it in the onStop() method, which is called when the SMSActivity stops, to avoid leaks:
@Override
protected void onStop() {
  super.onStop();
  unregisterReceiver(smsSentReceiver);
}
And that’s it! You have now created your first simple and practical Android application =)
Share


Key Topics

Article
Women Who Code: Transforming the Tech Landscape with Diversity and Skill
Key Takeaways Introduction Over the years, gender inclusivity has constantly been a subject of dispute...

Article
Embracing EQ in UX: A New Era for the Philippines National Skills Framework
Key Insights Introduction The Philippines has long stood as a bastion of warmth and understanding,...
Article
Transforming Tech Talent: Philippines Introduces Game-Changing National Skills Framework for IT Excellence
In today’s rapidly advancing technological world, the gap between academic learning and industry requirements in...