
Catch Up! If you haven’t seen the first and second part of this Beginning Android tutorial series, please take some time to read it before reading this article. Just click on the following links.
Introduction
The Google AdMob Ads provides application developers tools to promote, measure and monetize mobile apps.
Creating the AdMob Ads Android Project
To display banners in your Android app, simply add the AdMob SDK into your project and add a com.google.ads.AdView to your UI.
Dependencies and prerequisites
- Android 3.2 compiler or higherNote: According to the official AdMob documentation you should make sure you have the latest copy of the Android SDK and that you’re compiling against at least Android v3.2. Compiling against newer versions of Android doesn’t mean your apps will not run on older versions of Android. You just have to make your apps backward compatible in terms of binary and functionality.See What API Level Should I Target? If you are still compiling against significantly older versions of the SDK you are doing it wrong.

- Android SDK
- Google AdMob Ads SDK for Android
Setting Up The Banner
Incorporating the Google AdMob Ads into an Android project is easy. Simply follow these steps:
- Sign up with AdMob and download the latest AdMob SDK. AdMob Payment Details When AdMob asks about your Payment Details you can tell AdMob to use your PayPal account as the payment method. Sign up for a PayPal account if you don’t have one.Ad Unit ID You can retrieve this ID after you’ve finish setting up your Site/App in AdMob. Just go to your Site/App › Manage Settings.
- Add the AdMob SDK to your project build path.
- Setup the required network permissions and
com.google.ads.AdActivity in AndroidManifest.xml. - Setup the AdView instance.
Add The AdMob SDK To Project Build Path
Create a new folder named “libs” in your project root directory and paste the GoogleAdMobAdsSdk-x.x.x.jar there. Then simply right-click on the GoogleAdMobAdsSdk-x.x.x.jar, click Build Path › Add To Build Path in your Eclipse IDE.

Setup The Required Network Permissions and AdActivity in AndroidManifest.xml
Making an ad request requires the INTERNET and ACCESS_NETWORK_STATE permissions. Open AndroidManifest.xml (located in your projects root directory) and add the following permissions

The AdMob SDK also requires that AdActivity be declared in AndroidManifest.xml:

The project should be able to build without any errors.
Setup the AdView instance
The AdView is simply a view displaying HTML5 ads that responds to user touch. An AdView (like any View in Android) may be created either purely in Java code or in XML. The following example uses XML.
Open main.xml (located in /res/layout) and replace its contents with the code below:

The project will build with error because it cannot find “@string/adMobId”. Simply open strings.xml (located in /res/values/) and add the following code to resolve the error:

Replace MY_AD_UNIT_ID with your actual Ad Unit ID and save the project. The project should be able to build without any errors.
ALL DONE!
When you run the project you should see a banner at the top level of the screen:

The complete source code for this application is hosted at Kenai.com. You must have a Subversion client installed on your machine to checkout the project repository.
If you have the command line Subversion client, you can checkout the repository by running: svn co https://svn.kenai.com/svn/ron-os-sample-code~project-code-repository/BeginningAndroidProjects/AdMobAds
Creating the Banner in Pure Java
You now know how to create banner from XML. I created a new project called AdMobAds2, which is a modified version of AdMobAds project to show you how to create banner in pure Java.
svn co https://svn.kenai.com/svn/ron-os-sample-code~project-code-repository/BeginningAndroidProjects/AdMobAds
svn co https://svn.kenai.com/svn/ron-os-sample-code~project-code-repository/BeginningAndroidProjects/AdMobAds2
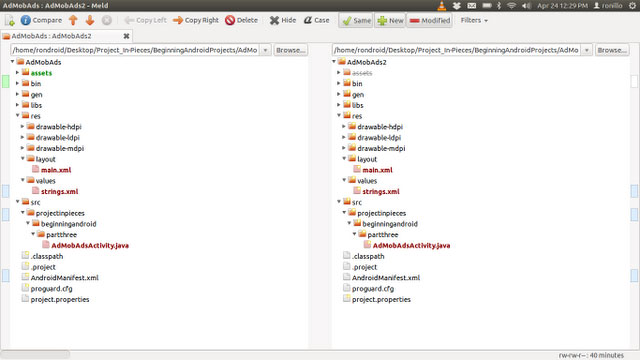
Now checkout AdMobAds and AdMobAds2 project using any Subversion client and use a file comparison tool such as Meld to see the difference between the project.
Once you’ve checked out the AdMobAds2 project, open it with Eclipse and take a look at the implementation of the onStart() method of AdMobAdsActivity.java.

I instantiated a new AdRequest object at line 62. Then at line 65 to 71 I set the devices which will receive test ads only. I will not explain the detail of the Java code here because I assume you already know how to read and understand Java language. But there’s one thing I would like to note, PLEASE DO NOT FORGET TO ADD YOUR ANDROID TEST DEVICE HASH ID IN strings.xml (located in /res/values/) as shown in screen-shot below:

This is important because you do not want to make wrong impressions and violate the terms and conditions of AdMob. The easiest way to find you Android device ID is to look at the LogCat and search for a message similar to this one:
I/Ads(5899): To get test ads on this device, call adRequest.addTestDevice(“73CC3A21D…”);
The quoted string is your hash device ID.
Share


Key Topics

Article
Women Who Code: Transforming the Tech Landscape with Diversity and Skill
Key Takeaways Introduction Over the years, gender inclusivity has constantly been a subject of dispute...

Article
Embracing EQ in UX: A New Era for the Philippines National Skills Framework
Key Insights Introduction The Philippines has long stood as a bastion of warmth and understanding,...

Article
Transforming Tech Talent: Philippines Introduces Game-Changing National Skills Framework for IT Excellence
In today’s rapidly advancing technological world, the gap between academic learning and industry requirements in...