Outline
- An Introduction to the Raspberry Pi
What is a Raspberry Pi?
The Raspberry Pi is a low-cost, credit card-sized (or smaller, depending on the model), single-board computer (SBC) developed by the Raspberry Pi Foundation. You can compare it to your usual computer albeit, at a lower processing speed. The main goal of the foundation is to “put the power of computing and digital making into the hands of people all over the world”. With this in mind, the Raspberry Pi SBCs are used in many different applications, ranging from educational up to industrial purposes. Personally, my Pi at home serves as a media server, emulation station, ad-blocker, and sometimes, a development board to test out some sensors and modules. In the following sections, we will look at the different features that the Raspberry Pi SBCs offer.
Hardware Features
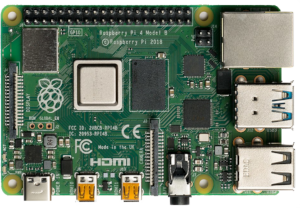
This series of small computers feature a system on a chip (SoC) having an ARM processor. At the time of writing, the latest model under the standard form factor is the Raspberry Pi 4 Model B. It has a 64-bit quad-core ARM Cortex-A72 processor running at 1.5 GHz, and can have a RAM of up to 8GB, depending on your needs. All of the Pi SBCs use micro SD cards for booting the OS as well as for storage. Below is a summary of the hardware features and differences between the Raspberry Pi models* 3B+ and 4B:
| Model | SoC | Processor Frequency | RAM | Form Factor |
|---|---|---|---|---|
| Raspberry Pi 3B+ | BCM2837B0 | 1.4 GHz | 1GB LPDDR2 | Standard |
| Raspberry Pi 4B | BCM2711 | 1.5 GHz | 2GB, 4GB or 8GB LPDDR4-3200 | Standard |
In terms of wireless connectivity, the models above have support for Bluetooth connectivity (both BR/EDR and BLE), as well as dual-band (2.4 GHz and 5 GHz) wireless LAN. For wired connectivity, all of the models above support Gigabit Ethernet.
The Raspberry Pi SBCs also support different peripherals. The ports and connectors needed for them are summarized below:
| Model | USB Ports | Display Output | DSI and CSI Connectors | GPIO Pins | Audio and Composite Video Port |
|---|---|---|---|---|---|
| Raspberry Pi 3B+ | 4x USB 2.0 | 1x Regular-sized HDMI (up to 1080p) | Yes | 40 Pins | Yes |
| Raspberry Pi 4B | 2x USB 3.0 and 2x USB 2.0 | 2x Micro HDMI (up to 4Kp60) | Yes | 40 Pins | Yes |
* There are many other families and models of the Raspberry Pi that are not included here such as the 3A+, Zero W, 400, etc… You can check them all out at the Raspberry Pi products page
About the CSI, DSI, and GPIO
You might have been reading the summary above and are wondering, “What the heck are those DSI, CSI, and GPIO things?”. Well, aside from the ports that you usually use to connect peripheral devices (such as USB ports, HDMI ports, etc…), the Raspberry Pi also has these other connectors used to connect other electronic devices or modules.
DSI and CSI stand for Display Serial Interface and Camera Serial Interface, respectively. They are used to connect a camera module and a display using a CSI or DSI cable thingy (no joke, this is how Adafruit calls this product due to how their customers reference it by that name). This makes it easier for enthusiasts to develop projects such as a DIY Touchscreen Camera. But maybe you wanted to do more. Maybe you want to light up an LED or even start your robotics project. Then this is where the GPIO pins shine.
GPIO stands for General-Purpose Input/Output and are used to perform digital input or output stuff. The Raspberry Pi models above feature a 40-pin GPIO header but not all of those pins are used for input or output. Some of them are used as power sources or grounding pins. Below is an image of the GPIO layout for the models above*:
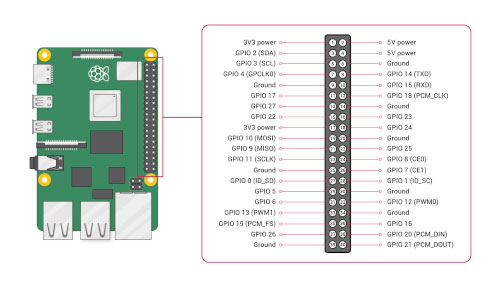
* If you already have your Pi setup, you can see the GPIO layout by starting a terminal and executing the
pinoutcommand
These GPIO pins can be controlled and programmed using Python and the RPi.GPIO module.
Software Features
As the Raspberry Pi is a single-board computer, it supports many different operating systems such as:
- Raspberry Pi OS (formerly known as Raspbian)
- FreeBSD
- Arch Linux ARM
- Kali Linux
- Ubuntu Core
- Window IoT Core
- RetroPie
In the Getting Started guide later, we will be using the Raspberry Pi OS as it provides a good starting point for beginners.
The Pi SBCs are also a good starting point for those who want to learn how to code, as some programming languages are already available out of the box.
Now that I have introduced some of the basic features of the Raspberry Pi, let’s go and set one up.
Getting Started with Your Raspberry Pi
Standard Installation
What you will need:
- Raspberry Pi (the model used here is a Raspberry Pi 3 Model B+)
- Micro SD card (preferably 8GB or greater) and an adaptor
- Another computer that has an SD card reader
- Keyboard and mouse
- Power SupplyThe Raspberry Pi models 1, 2, and 3 use a micro USB power supply, while the model 4 uses a USB Type-C connector. It is recommended to use the official power supply to ensure a proper performance out of your Pi.
- Monitor and an HDMI cableIf you have a Raspberry Pi 4, a micro HDMI cable is needed
- Ethernet Cable (optional)
Installing the OS
Before proceeding, be sure to backup any important files in your SD card, as this step will overwrite its contents
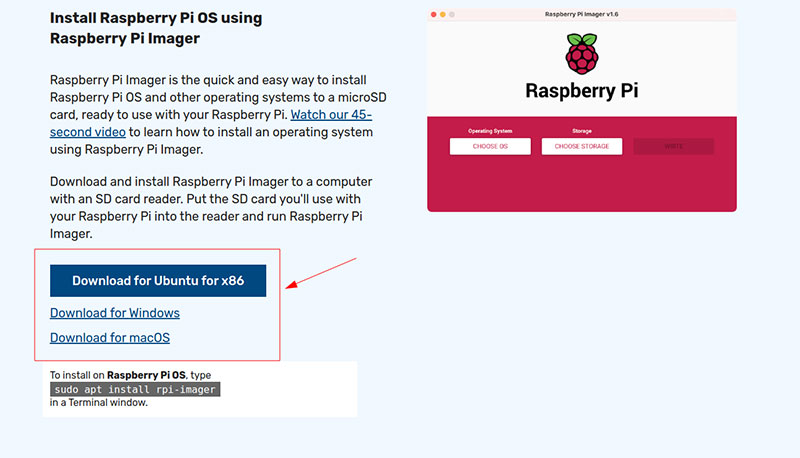
Using the Raspberry Pi Imager
STEP 1: DOWNLOADING AND INSTALLING THE RASPBERRY PI IMAGER
You can download the Raspberry Pi Imager software here. You should be redirected to the website in the screenshot below. From there, simply select the distribution that matches your operating system.
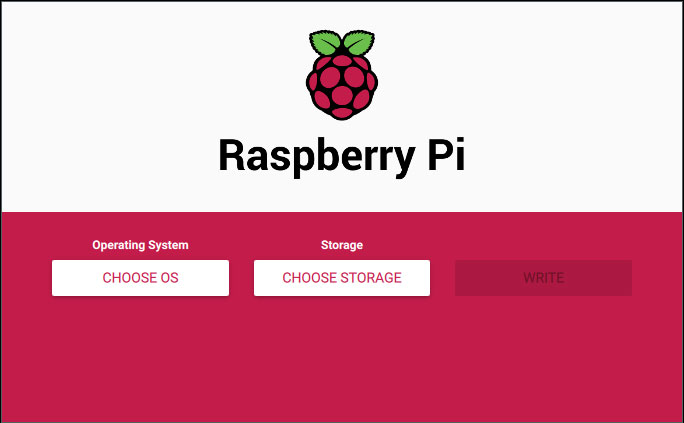
Once downloaded, you can go ahead and install it in your system for use. After the installation, you will be greeted by the following screen:
STEP 2: WRITING THE OS TO THE SD CARD
If you haven’t yet, go ahead and insert your SD card to your computer.
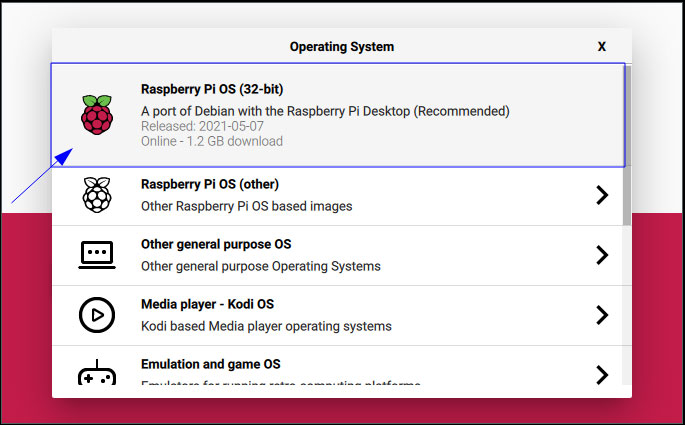
Once the Raspberry Pi Imager starts, select Choose OS. A popup shows that lets you select the operating system you want to install. For now, simply choose Raspberry Pi OS (32-bit)
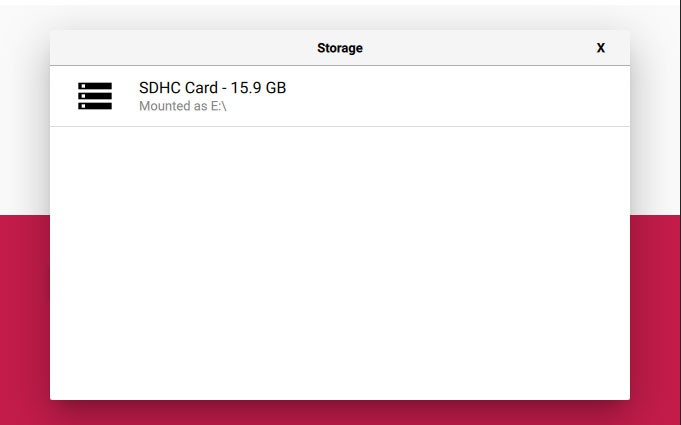
After selecting your desired operating system, click choose storage and select your SD card.
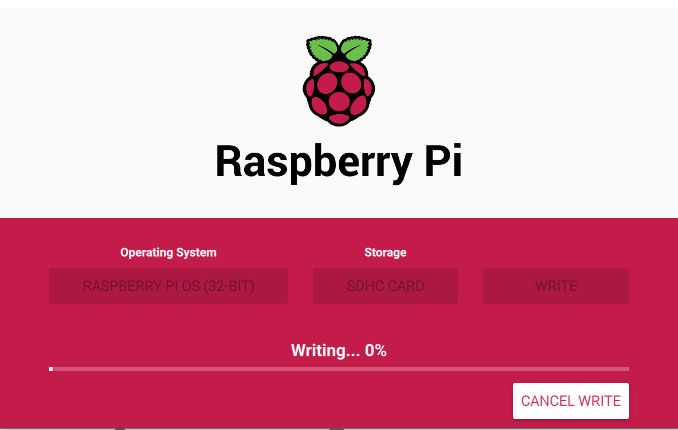
After selecting your storage, go ahead and click Write. A warning will pop up. If you haven’t backed up your files yet, select No and do so. Otherwise, if you are ready to proceed, simply select Yes.
Once the process is complete, you can eject the SD card and insert it on your Pi.
Using Etcher
If for some reason, you are having problems using the Raspberry Pi Imager, or you simply do not want to use it, you can use other tools to write the image to your SD card. I recommend using Etcher. This tool is closely similar to the Raspberry Pi Imager. The only difference is that you have to manually obtain the .img file for the OS you want to install.
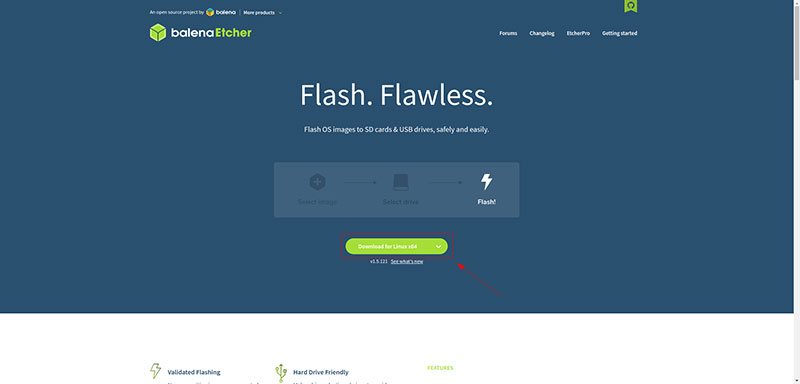
STEP 1. DOWNLOADING AND INSTALLING ETCHER
You can download Etcher using this link. You will be redirected to the website in the screenshot below. Simply select the distribution that matches your operating system from the dropdown.
After downloading, you can go ahead and install it in your system for use later.
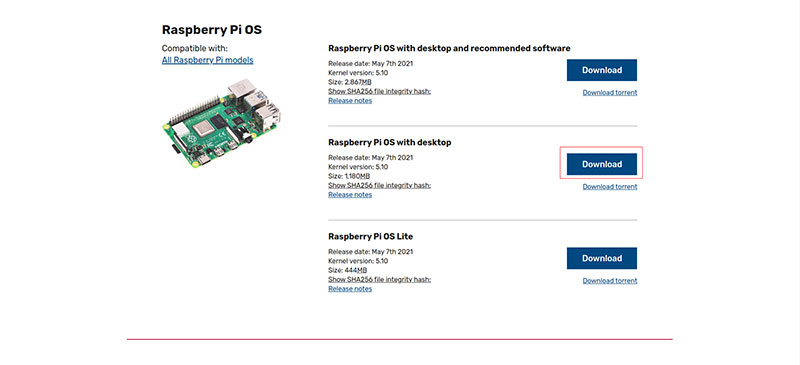
STEP 2. DOWNLOADING THE IMAGE FOR THE OS
You can download the image file for the Raspberry Pi OS by clicking this link. You can choose to download the operating system that you want but for now, go ahead and download the Raspberry Pi OS with desktop.
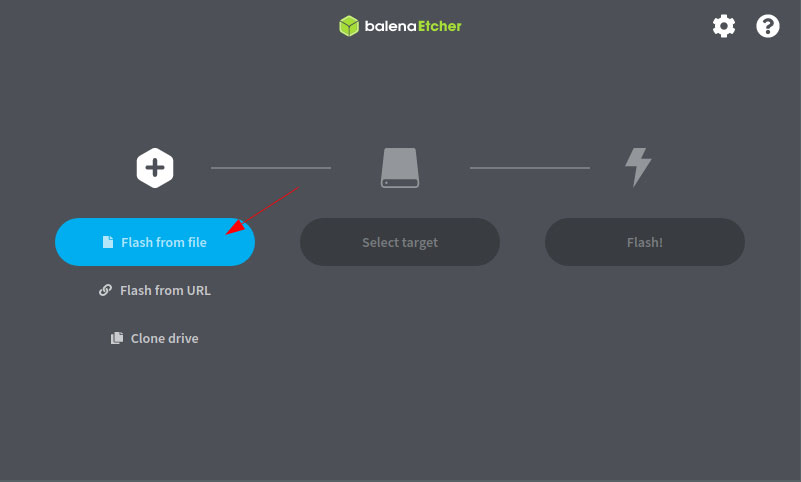
STEP 3. FLASHING THE IMAGE TO THE SD CARD
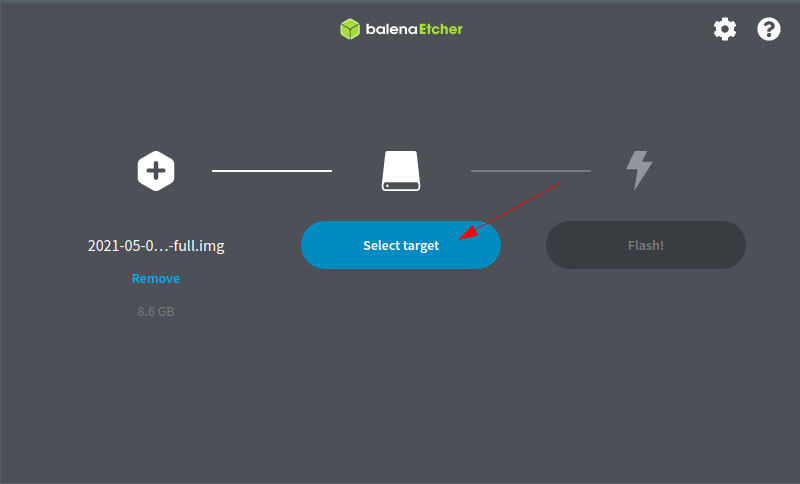
Once Etcher is started, select the Flash from file option and choose the downloaded file from Step 2. The .img file inside the zip file should automatically be detected. If not, ensure that the zip file is not broken or corrupt. You may also extract the contents of the zip file then select the extracted .img file when selecting a file to flash.
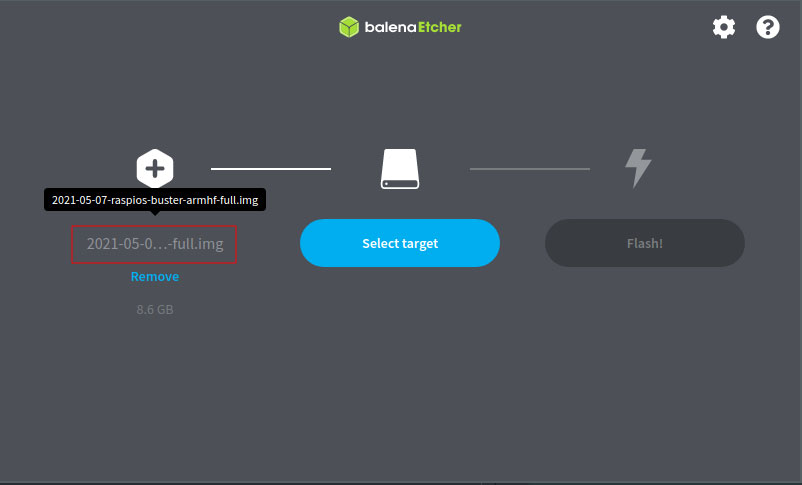
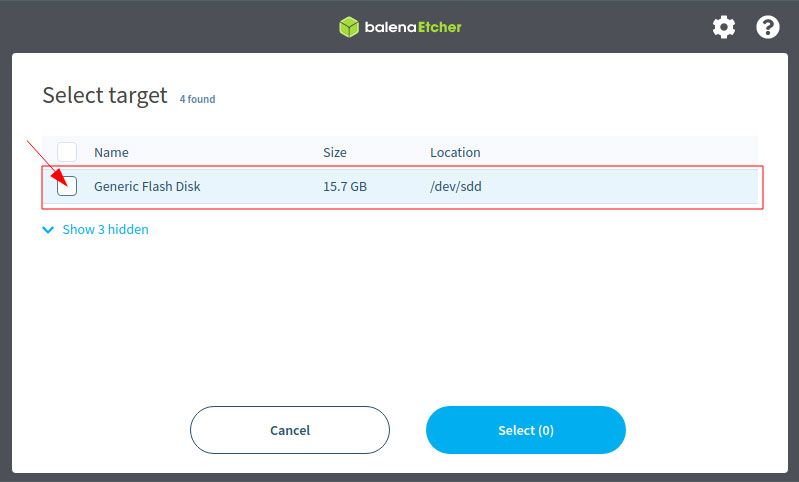
After selecting your desired operating system, click Select target. A popup will show the available devices on which the image can be written to. Select your SD card from the list.
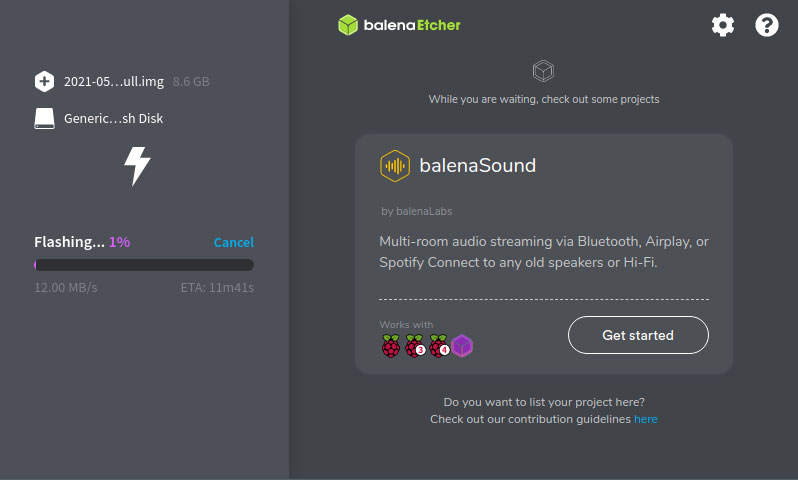
After selecting your SD card, go ahead and click Flash! and wait for the process to finish.
Once the process is complete, you can eject the SD card and insert it on your Pi.
Setting up Your Peripherals
After writing an OS to your SD card and inserting it to the Pi, you can go ahead and connect your other peripheral devices such as your keyboard, mouse, monitor, and Ethernet Cable.
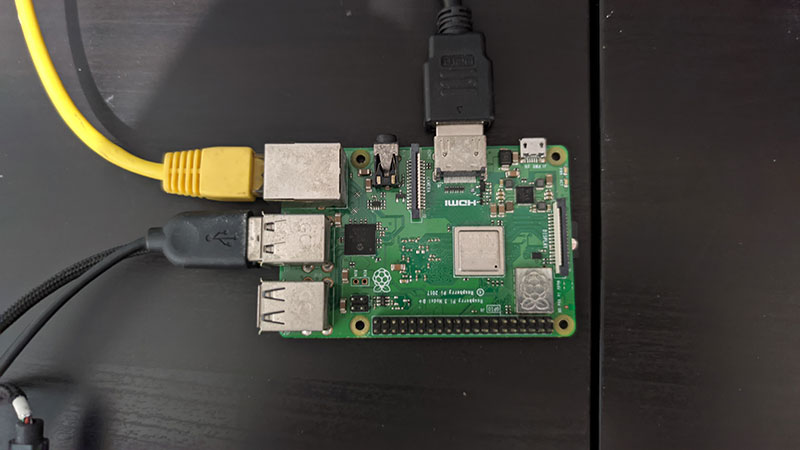
After connecting your peripherals, go ahead and connect your power supply. The green and red LEDs near the power connector should light up. Upon booting, you will be greeted by this screen:
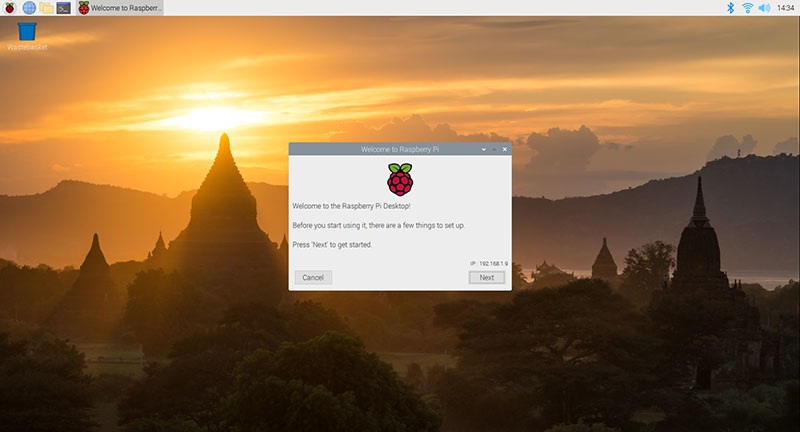
Some Finishing Touches
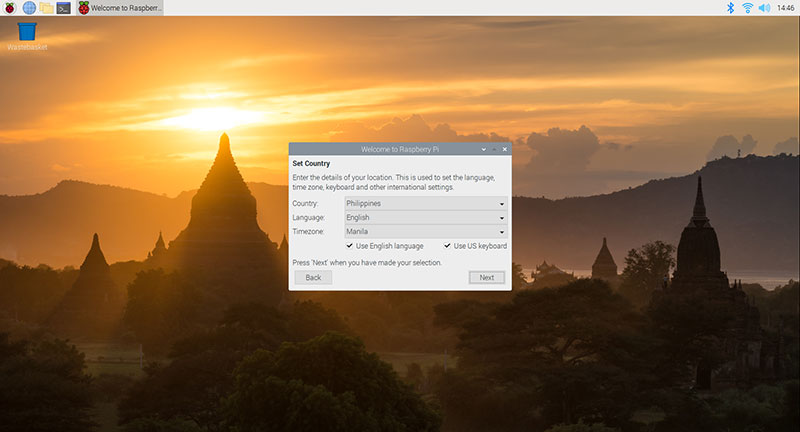
Voila! You have successfully booted your Raspberry Pi! Simply follow the on-screen prompts to proceed:
It is important to change the default password for your Pi. A standard Raspberry Pi OS installation has a default user pi and a default password raspberry. The prompt below will help you update your password (although you can do it later):

If there are black borders around your display, tick the checkbox once the prompt below shows up. Checking this option will cause the screen to be re-adjusted so that it takes the whole space of the monitor on the next reboot:

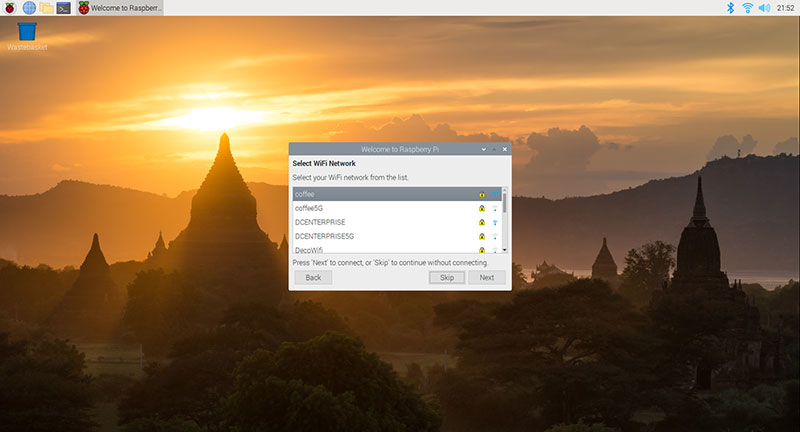
The setup will also prompt you to connect to your WiFi network:
You can also choose to update the currently installed software on your Pi. Note that this may take a long time depending on the speed of your network:

Once the whole setup is finished, you will be prompted to restart your Pi:
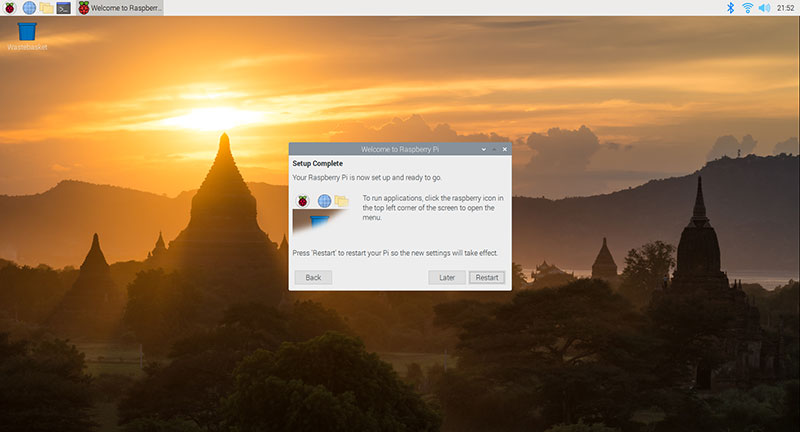
And that’s it! You’re done setting up your Pi. Feel free to explore the software available, just like how you would use a normal computer. If you want to get started hacking with your Pi, you can explore the Raspberry Pi Blog to get some ideas.
Share


Key Topics

Article
Women Who Code: Transforming the Tech Landscape with Diversity and Skill
Key Takeaways Introduction Over the years, gender inclusivity has constantly been a subject of dispute...

Article
Embracing EQ in UX: A New Era for the Philippines National Skills Framework
Key Insights Introduction The Philippines has long stood as a bastion of warmth and understanding,...

Article
Transforming Tech Talent: Philippines Introduces Game-Changing National Skills Framework for IT Excellence
In today’s rapidly advancing technological world, the gap between academic learning and industry requirements in...